
Replace crankshaft position sensor
Removing the old crankshaft position sensor
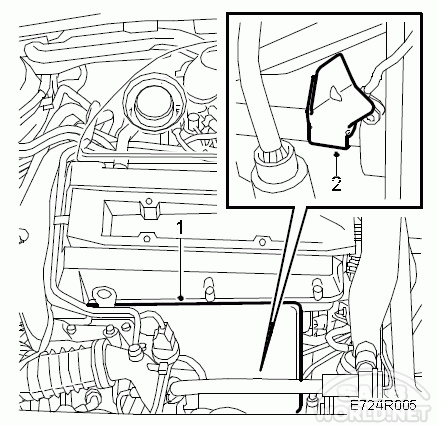
- Remove the exhaust manifold heat shield.

- Remove the screw securing the heat shield over the sensor.
- Remove the sensor and it’s o-ring.
- Follow the sensor connecting cable and undo the clip on the water pipe.
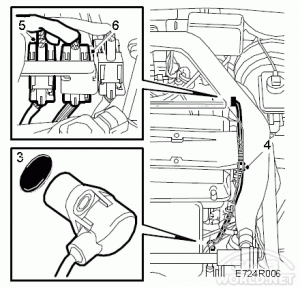
- Remove the connector from the holder.
- Pull out the plug.
- Remove the old sensor.

Installing the new crankshaft position sensor.
- Mount the sensor temporarily so that the cable runs along the water line. Replace the o-ring if necessary and lubricate it with engine oil before installation.
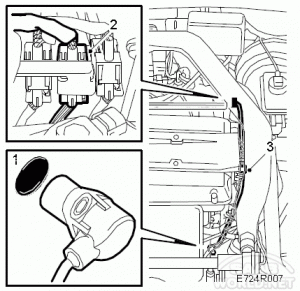
- Spray the contact with “Kontakt 61” (art.no. PN 30 04 520), then press the connector back into the cradle.
- Secure the cables with the clamp. Make sure not to pinch or damage any cables with the clamp.
- Install the new sensor with o-ring and the heat shield. Make sure the o-ring is properly positioned so that the sensor bottoms in the engine block. Otherwise there is a risk that the sensor breaks while mounting it.
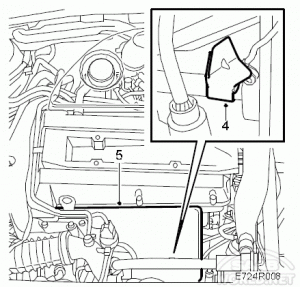
- Lubricate the screw for the exhaust manifold heat shield with Molykote 1000 or equivalent (part no. 30 20 271) and install the heat shield.
Tighten the nut and heat shield with 20 Nm (15 lbf ft) - Start the engine and check for any leakage.


This guide is borrowed from Saabworld.net